I removed my DP1m hotmirror, step by step with photos
|
I removed my DP1m hotmirror, step by step with photos
8 hours ago
|
Do not try this. I am literally an engineering school dropout with no idea what I'm doing. I am not responsible for whatever warranty voiding, $1000 camera destroying antics you perform. That being said I found this extremely easy.
1) Its a good idea to work in a clean space. I used a small toolkit with I think a #000 phillips and occasionally a very small flathead screwdriver to pry or mess with tiny connectors. I also used small bowls to hold my screws so I could isolate them from other steps. When possible I have shown the screws that go to that step in case they get mixed.
2) Do not force anything. Everything comes apart with virtually no force. If you have to force it you're doing it wrong. I missed the flash hot shoe screw for a day until Laurence Matson explained where it was. Thank you Laurence. Some connectors are very difficult to reattach. Relax. Give it time.
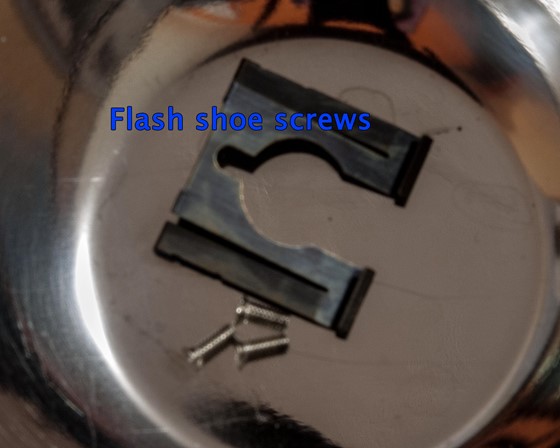
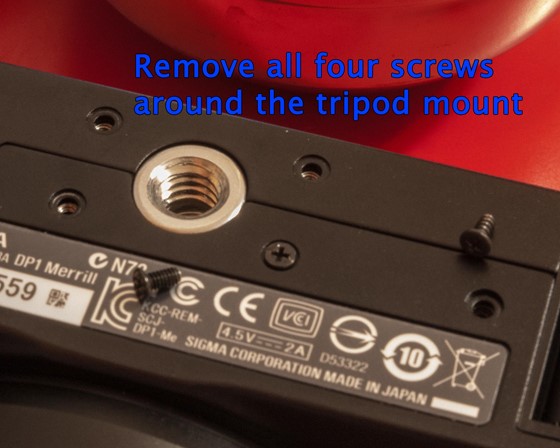
3) Remove all the screws from the rear of the body plus the screws around the tripod mount (all four, with two being on the front half of the bottom of the body). There are screws hidden under the flash hot shoe. You have to remove the metal cover with a small flat-headed screwdriver and pry in the circular hole just in front of the main flash contact. Watch the video. It gets good about one minute in. (I removed three flash screws when I think I only needed to remove two)
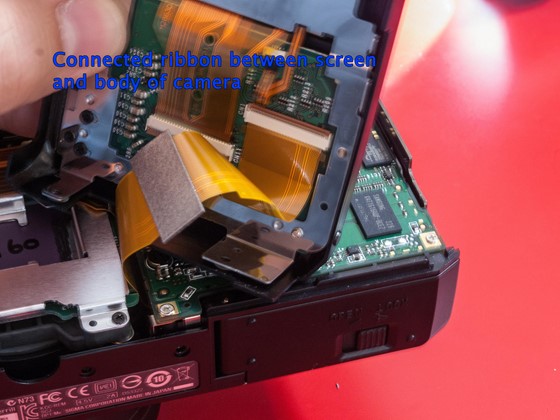
4) There will be a ribbon cable holding the back to the main body. Flip up the brown connector with your finger nail and the ribbon should gently pull out. Gently. You can easily access it if you open the camera like a book, with the hinge/spine on the right, where the battery cover is. The back is free and can be set aside.
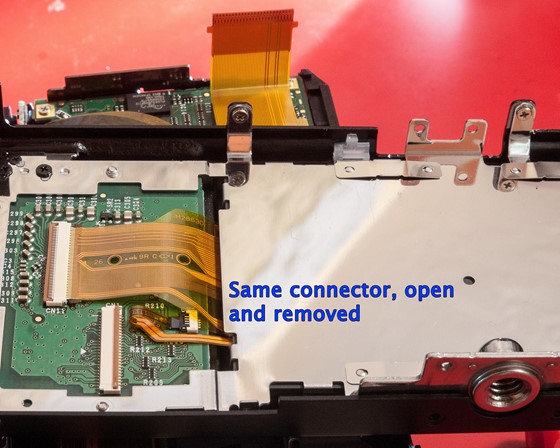
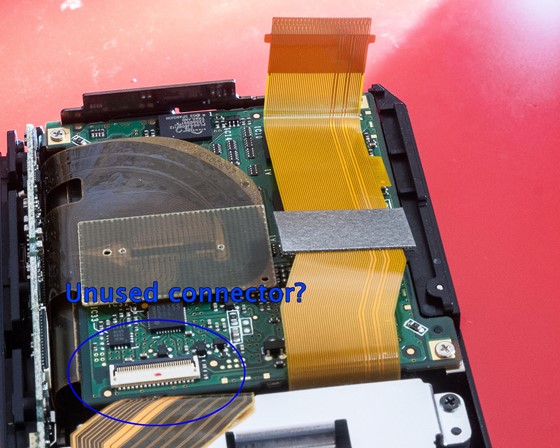
5) Under and to the left of the hot shoe there is another ribbon cable connected. Release this one, I suggest, with a small flat-headed screwdriver. First you see it closed. Second image is open. Gently push one side open, as in slide it away from the closed position. Not too much. Then the other side. Alternate so as not to put too much force on either side. Half a millimeter at a time it will come off.
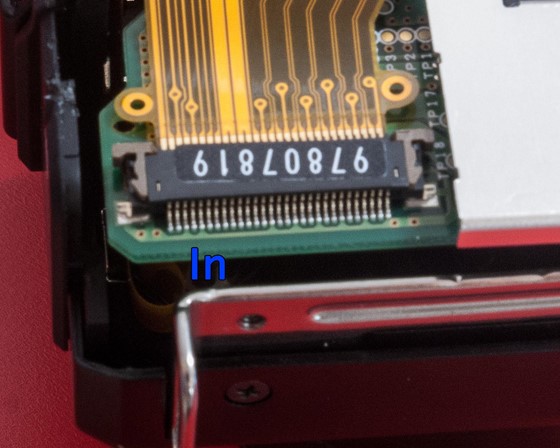
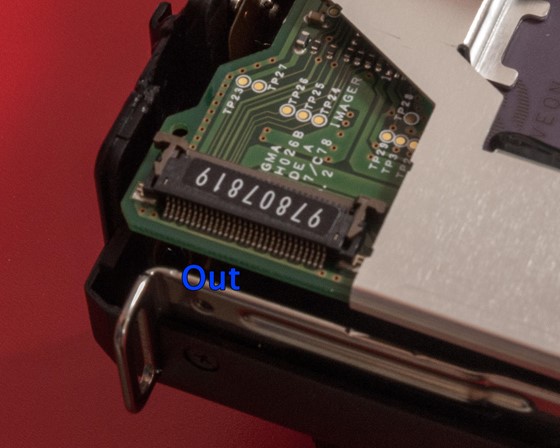
6) That big cable you just unhooked is still glued to the back of the sensor brick. If I had known ahead of time I would have used a sharpie and made a mark to know where the cable goes left to right, because I didn't know where the slack needed to be upon reassembly. Anyway, the ribbon can be pulled off gently. I would try not to bend it.
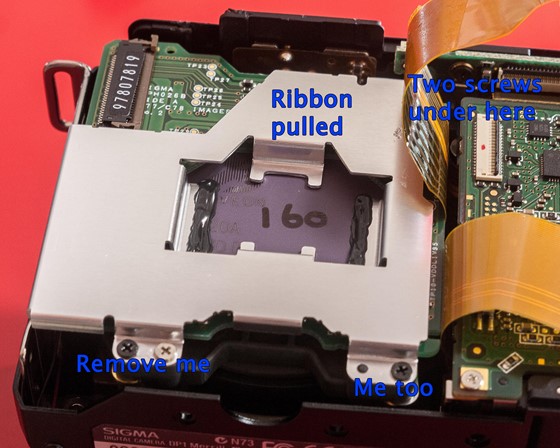
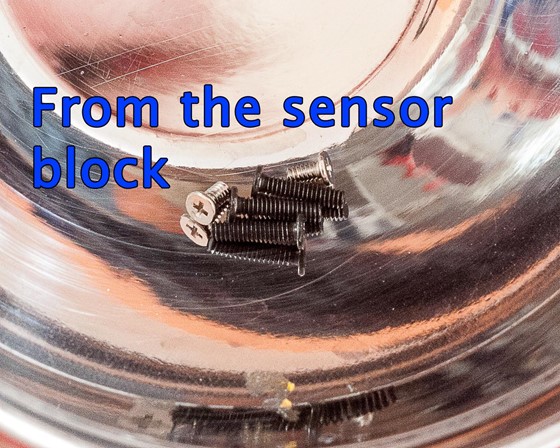
7) Remove the five screws from the back of the sensor package. Shiny to the right, black to the left. Notice the bottom right has only one screw.
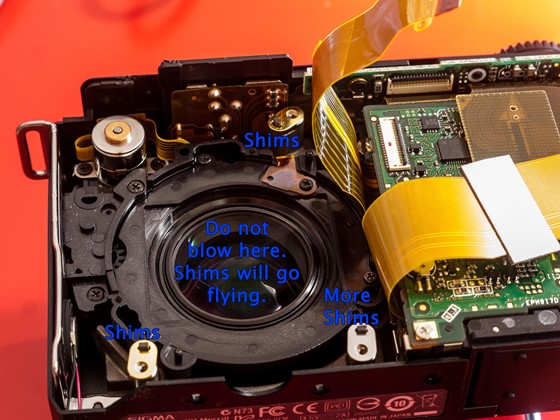
8) See those shims? Don't mess with them. Also don't try to use a can of air to clean your lens. It will make it snow shims on your desk.
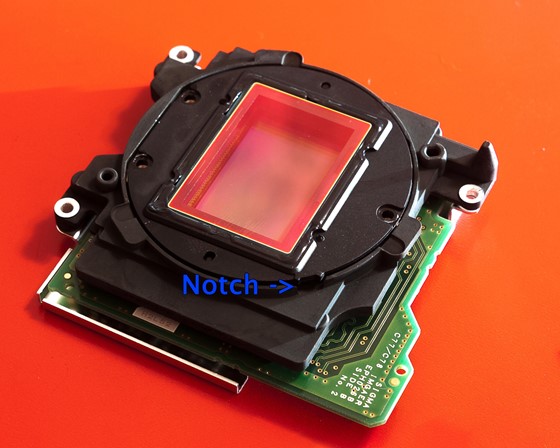
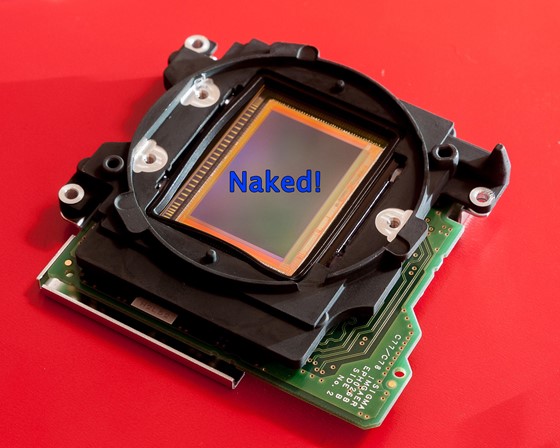
9) Back to the sensor, you see the three screws holding the greenish glass filter? Remove the screws and the filter. Notice there is a notched area on one corner. It seems the right way to lift the glass out. Again with the small screwdriver. Best I can tell there is no reason that plastic frame has to be there so I bagged that up with the screws and kept it. No damage done.
10) Reverse the disassembly. Notice I have before and after pics for the ribbon connectors. My big question was how far to push in the ribbon before I could close the connector on it and I hope the images help.
Most instructions I see on the regular DP1 says to break a piece of glass. I removed the holder here and haven't found any problems in terms of focus or anything. I also had one shim not get replaced when it flew out, but again everything seems to work fine. I might do some testing later to see if I need to break the glass and replace the shim.
Ask away and I hope this helps people out. Also, I got my DP1m from Sigma as a refurbished unit knowing I would void any warranty anyway and they shipped the next day and it was only $10 for 2 day shipping. For someone in the US there are few options before full MSRP and this was faster than buying an Asian import.
|
Awesome report, thank you so much.
In reply to Nicholas Johnson,
8 hours ago
|
Bravo! I want to thank you for making it clear how this works. I may well try this on my DP1M also as I am itching for an IR DPM.
It gives me a lot of confidence knowing the glass is not somehow glued in...
Did you take any particular precautions in preventing dust from getting in the camera before you sealed up?
|
Re: Awesome report, thank you so much.
In reply to Kendall Helmstetter Gelner,
8 hours ago
|
Did you take any particular precautions in preventing dust from getting in the camera before you sealed up?
I gave the sensor a good blowing with a can of air as well as the inside of the lens (when I made it rain shims) but other than that no. My workstation was disgusting and I was working fast so my wife wouldn't catch me tearing apart another piece of new electronics. I've shot down to f/11 and haven't noticed any dust when pixel peeping. I'll have to take a minute to stop way down and shoot a clear sky when we get one here. Been cloudy for days.
A word of caution: I've found increased flare for visible light shots (additional filter on the end), but I have ordered the hood. I hope that helps.
|
Re: I removed my DP1m hotmirror, step by step with photos
In reply to Nicholas Johnson,
8 hours ago
|
Congrats again Nicholas & thanks for sharing your journey
That is a trick idea about the Hot Shoe & concealed screws......!
The Hot Mirror can be left out like this.Therata-dpr-large-image-height="752" data-dpr-xlarge-image-width="1600" data-dpr-xlarge-image-height="1280" data-dpr-full-image-width="2299" data-dpr-full-image-height="1839">
6) That big cable you just unhooked is still glued to the back of the sensor brick. If I had known ahead of time I would have used a sharpie and made a mark to know where the cable goes left to right, because I didn't know where the slack needed to be upon reassembly. Anyway, the ribbon can be pulled off gently. I would try not to bend it.

7) Remove the five screws from the back of the sensor package. Shiny to the right, black to the left. Notice the bottom right has only one screw.

8) See those shims? Don't mess with them. Also don't try to use a can of air to clean your lens. It will make it snow shims on your desk.

9) Back to the sensor, you see the three screws holding the greenish glass filter? Remove the screws and the filter. Notice there is a notched area on one corner. It seems the right way to lift the glass out. Again with the small screwdriver. Best I can tell there is no reason that plastic frame has to be there so I bagged that up with the screws and kept it. No damage done.


10) Reverse the disassembly. Notice I have before and after pics for the ribbon connectors. My big question was how far to push in the ribbon before I could close the connector on it and I hope the images help.
Most instructions I see on the regular DP1 says to break a piece of glass. I removed the holder here and haven't found any problems in terms of focus or anything. I also had one shim not get replaced when it flew out, but again everything seems to work fine. I might do some testing later to see if I need to break the glass and replace the shim.
Ask away and I hope this helps people out. Also, I got my DP1m from Sigma as a refurbished unit knowing I would void any warranty anyway and they shipped the next day and it was only $10 for 2 day shipping. For someone in the US there are few options before full MSRP and this was faster than buying an Asian import.
|
Awesome report, thank you so much.
In reply to Nicholas Johnson,
8 hours ago
|
Bravo! I want to thank you for making it clear how this works. I may well try this on my DP1M also as I am itching for an IR DPM.
It gives me a lot of confidence knowing the glass is not somehow glued in...
Did you take any particular precautions in preventing dust from getting in the camera before you sealed up?
|
Re: Awesome report, thank you so much.
In reply to Kendall Helmstetter Gelner,
8 hours ago
|
Did you take any particular precautions in preventing dust from getting in the camera before you sealed up?
I gave the sensor a good blowing with a can of air as well as the inside of the lens (when I made it rain shims) but other than that no. My workstation was disgusting and I was working fast so my wife wouldn't catch me tearing apart another piece of new electronics. I've shot down to f/11 and haven't noticed any dust when pixel peeping. I'll have to take a minute to stop way down and shoot a clear sky when we get one here. Been cloudy for days.
A word of caution: I've found increased flare for visible light shots (additional filter on the end), but I have ordered the hood. I hope that helps.
|
Re: I removed my DP1m hotmirror, step by step with photos
In reply to Nicholas Johnson,
8 hours ago
|
Congrats again Nicholas & thanks for sharing your journey
That is a trick idea about the Hot Shoe & concealed screws......!
The Hot Mirror can be left out like this.There is a dust seal there to stop dust from getting on the sensor. The Hot Mirror's surround may stop some stray light ?? If you are having any problems with reflections you could make a dummy black disc out of card with a rectangle hole & stick or screw it in place of the hot mirror.
The Sensor isn't really naked, it has its own glass cover that also cuts UV light.
Enjoy your Full Spectrum Sigma DP1M
ΣigmaTog
|
Re: I removed my DP1m hotmirror, step by step with photos
In reply to Nicholas Johnson,
4 hours ago
|
So, ... What is a hotmirror? And why does it have to be removed? Does this improve the quality of your pixels?
|
Re: I removed my DP1m hotmirror, step by step with photos
In reply to Jozef M,
4 hours ago
|
Jozef M wrote:
So, ... What is a hotmirror? And why does it have to be removed? Does this improve the quality of your pixels?
The hot mirror, doesn't need to be removed & doesn't improve anything !
The Hot Mirror is the Infrared cut filter (IRC) that makes it possible for the digital cameras silicon image chip to only see visible light, 420-660nm, blue to red, so that the ultraviolet & infrared light does not contaminate the image. We can not see the UV & IR light but the digital cameras silicon image chip can, like this...
 Sigma DP1 Digital Rich Full Spectrum without the hot mirror.
OR an Infrared converted to mono...
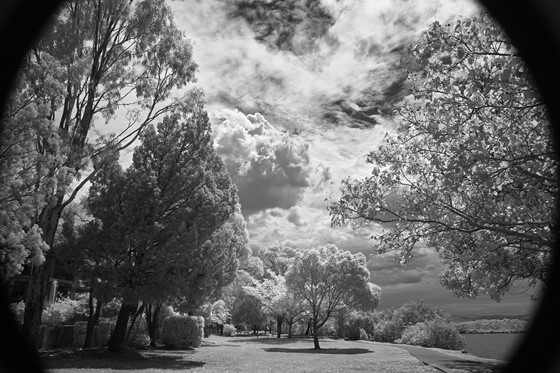 Sigma DP1 Digital IR 720-900nm filter & without the hot mirror, in mono.
The Sigma dSLR cameras have the hot mirror as a 'Dust Protector' & is removable & replaceable at any time, allowing you to take out-of-spectrum-photos any time
You can see more of my works here... http://www.flickr.com/photos/54724528@N06/sets/
Cheers
ΣigmaTog
|
Re: I removed my DP1m hotmirror, step by step with photos
In reply to Nicholas Johnson,
3 hours ago
|
Very impressive (and slightly scary). Looking forward to seeing your output.
Xpanded


